What is an iBeacon?
iBeacon is an indoor low-powered proximity system that can notify nearby iOS 7 devices of their presence. While many different brands of iBeacons can be supported, we recommend using Estimote beacons for your application with our Touch screen. iBeacon technology only works on iPad 2+, and iPhone 4S+, and Bluetooth must be enabled for it to work. iBeacon functionality built into iOS uses the same "location services" feature as GPS – so the arrow will appear in the menu bar of your iPad or iPhone during use. You also may be prompted to enable location services. These services must be enabled for iBeacon apps to work correctly.
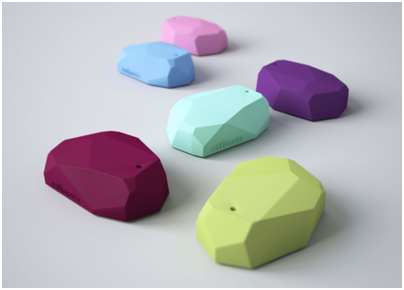
Figure 1 - iBeacons in various colors
Example File
In this example, we are using the file OfficeTour.tca. The first page "Home Page 1" in this example is a screen that a might appear if a person was near an equipment rack. In this case, a single Estimote beacon would be placed somewhere in this rack.
The "unlock" code for this example file is 1111.
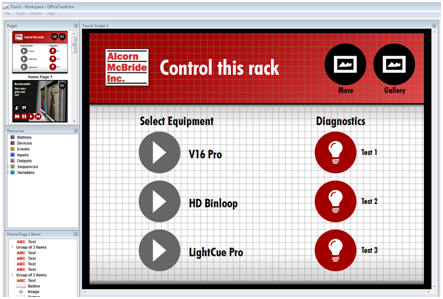
Figure 2 - Maintenance Screen in Touch
Touch Setup
In order to switch to the appropriate page based on a nearby beacon, a "Screen Action" must added into the Touch file.
1. To add a screen action, right click anywhere on one of your Touch pages and select "Settings." Then, select "Actions." Click on the button that reads, "Actions for this screen" as shown below.
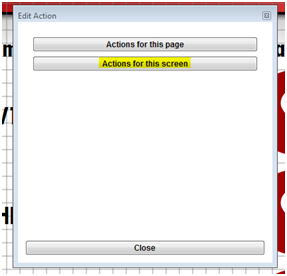
Figure 3 - Selecting "Actions for this screen"
2. Then click "add" to add a new action. You will add a single action for every beacon that you have.

Figure 4 - Click Add to associate beacon with page
3. Click "Display Page" to indicate that you will display a certain page when the beacon is nearby.
4. Select the page you wish to display when the beacon is nearby and click "Use Selected Page"
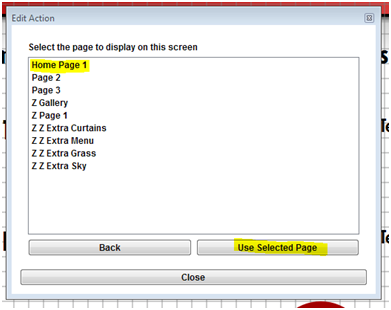
Figure 5 - Selecting Page to flip to when nearby beacon
5. Click "iBeacon" when selecting the cause for the page flip (as shown below)
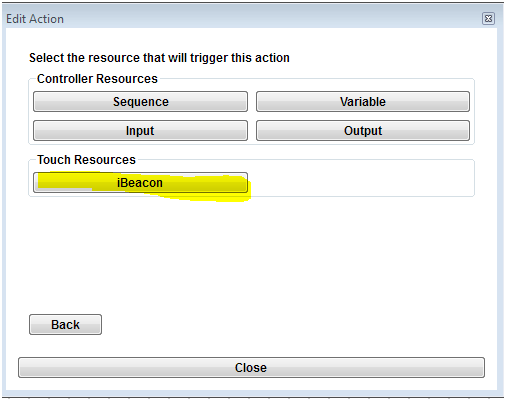
Figure 6 - Click iBeacon as resource that will trigger page change
6. Enter the UUID, Major and Minor number that of the beacon and then click "Finish". These ID numbers can be found by numerous iPad/iPhone apps, or by using the Touch for iPad app. See next section on "How to find an iBeacon's ID" for more details.

Figure 7 - Enter ID numbers
You configuration for your touch file is now complete. Click the "Save to Controller" option and pull the file from your controller on to your iPad.
How to find an iBeacon's ID
There are three different identifiers for the beacon. The Major Number, the Minor Number and the UUID. All three of these numbers will need to be entered into the Touch software program when you create your file to properly identify the page. There are various iPad/iPhone programs you can use to view and change these ID numbers. For example, the Estimote app displays Estimote beacons and allows changes to be made to the ID numbers.
You can view these numbers quickly in Touch for iPad by going to the main connection screen and selecting "Nearby iBeacons."
Note: if you have difficulty getting back to this main window, place your fingers simultaneously on the top right and lower left of the iPad/iPhone screen. This will return you to the "lockout" screen where you can enter your pass code. In our example, the pass code is 1111.
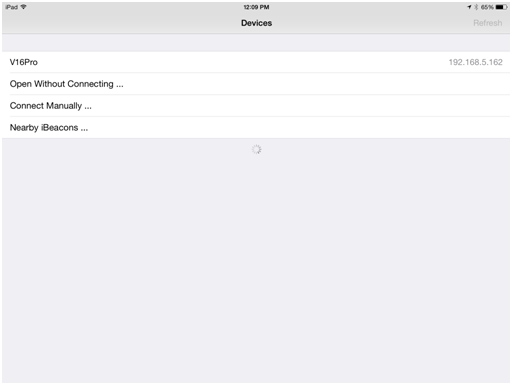
Figure 8 - Touch for iPad main connection screen
The Beacons will appear in a list as shown below:
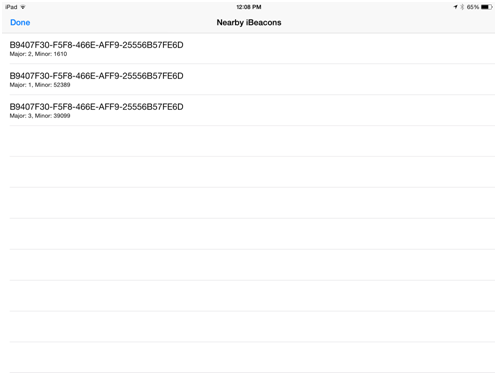
Figure 9 - Nearby iBeacons in Touch for iPad
Note: The UUID that is populated by default in the Touch for Windows application is the default ID for all Estimote beacons. UUIDs can be changed.