Using Sony Vegas Pro 11.0 to Encode Video for Alcorn McBride Video Products
Sony Vegas is very popular video editing software package that’s reasonably priced. It has a vast variety of export options that allow it to create compatible video for our products.
Like all encoding software with a great deal of versatility, the Render utility has a great deal of settings and options that can be a little overwhelming. Unfortunately, this software does not allow you to import and export preset files. However, we’ve created this guide to provide a good example of how to use this software to encode HD video for our products.
Installing Sony Vegas
Before you get started with this application note, you’ll need to have Sony Vegas Pro installed on your computer. This software is available as a Free Trial and purchase on the Sony website: Sony Vegas Pro
Create and Edit Your Project
Sorry, but this guide will not cover any details about how to use Sony Vegas Pro to create and edit content. You’re on your own for that one! However, once you work your magic and reach a point when you are ready to export content for an Alcorn McBride video product please procede with the instructions below.
Render Your Project for an Alcorn McBride Video Player
When you are ready to render your project into a file that’s compatible with an Alcorn McBride video product, click on File->Render As… A list will appear on your screen with many available templates provided by the software. Expand the template category called Main Concept MPEG-2, and then select Blu-ray 1920×1080-60i, 25 Mbps video stream. Then click Customize Template…
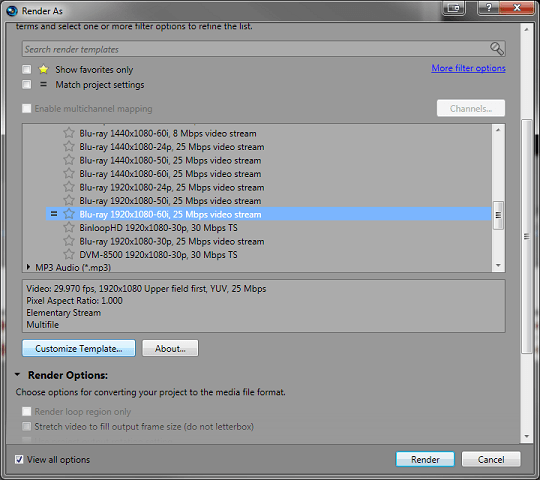
In the screen that follows, you can name the template whatever you wish. For this example, we are creating a template to encode 1080p video for our DVM-8500 High-Definition video player, so we have named our template “DVM-8500 1920×1080-30p, 30 Mbps TS”. There are several tabs of fairly advanced settings, so please refer to the following screenshots to enter in the correct settings.
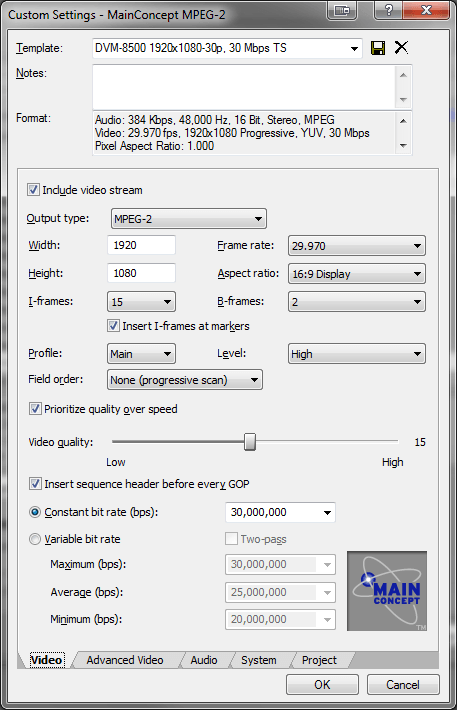
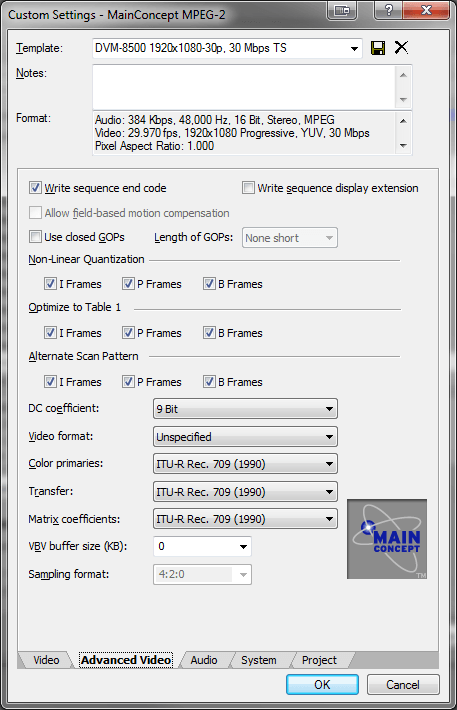
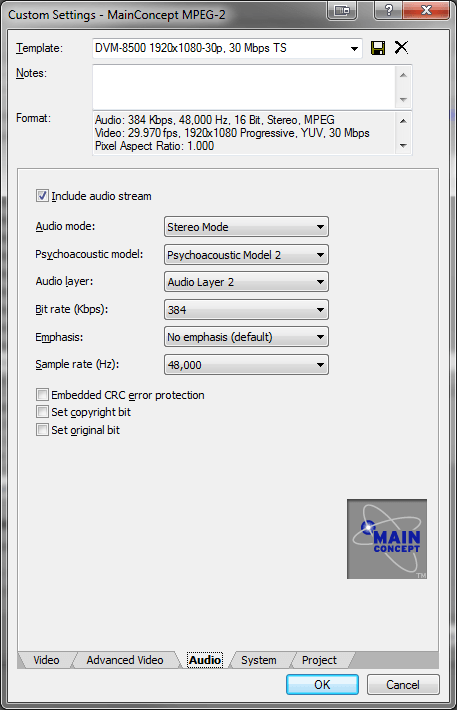
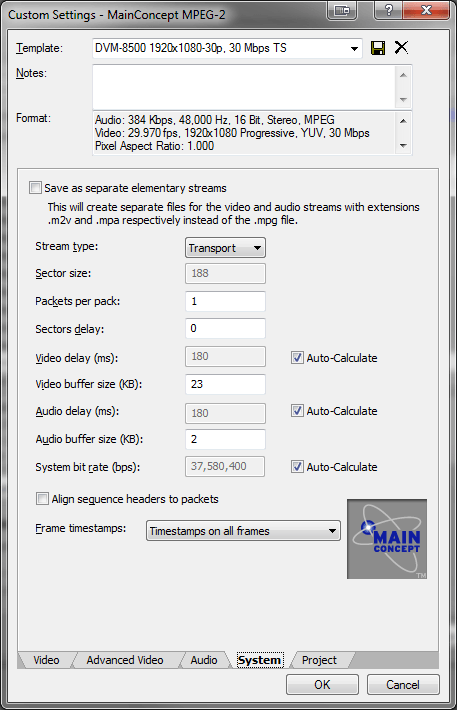

Once you have configured the settings as shown, click OK to return to the Render As screen. Keep in mind that the example settings listed above are for a 1080p clip that will play perfectly in any of our HD products (DVM8400, DVM8500, BinloopHD, Set Player, etc.). It is perfectly OK to change certain parameters, such as the output resolution (i.e. 1080i, 720p), framerate (29.97fps, 25fps), etc.
Once you return to the Render As screen, make sure your new preset is highlighted and then click the Render button.
Naming the Rendered File
The file extension that Vegas assigns the exported file may vary based on your preset selection. However, it is recommended in all cases that you rename the file extension to .MPG. Beyond that, each product has other features that are accessible by appropriately naming the file. For example, it is possible to give a file a special name so that it is played automatically upon powerup. It is also possible to name a file so that it is easily associated with a number (i.e. File #1). More information on file naming can be found in the User’s Guides of our video products.